Difference between revisions of "Employee Login"
(-) (Tag: Visual edit) |
(→Screen Shots / Steps) (Tag: Visual edit) |
||
| Line 36: | Line 36: | ||
- Select the Product from the list and enter required Quantity, Reason of transaction and click on '''Request Inventory''' button. | - Select the Product from the list and enter required Quantity, Reason of transaction and click on '''Request Inventory''' button. | ||
[[File:Requisition Inventory.png|border|center|frameless|900x900px]] | [[File:Requisition Inventory.png|border|center|frameless|900x900px]] | ||
| − | Not available Item can be added in '''Not in list''' | + | '''Not in List''' |
| − | [[File: | + | |
| − | [[File: | + | - Not available Item can be added in '''Not in list''' |
| + | |||
| + | - To add product click on '''Not in List''' hyperlink. | ||
| + | |||
| + | - Textbox will be enable, Enter product name and click on Add new Button. | ||
| + | |||
| + | - Once product added select UOM, Product type ( Consumable/ Non-Consumable ) and Required Quantity. | ||
| + | |||
| + | - If any modification has to be done in the product name after adding click on delete button. | ||
| + | [[File:Not in List.png|border|center|frameless|900x900px]] | ||
| + | [[File:Pending Requisition.png|center|frameless|900x900px]] | ||
Accepted Requisition | Accepted Requisition | ||
Revision as of 12:24, 31 March 2020
Roles
Staff/Faculty
Path
Requisitions » Resource Related » Inventory » Inventory Requisition
Functionality
- User can able to raise inventory requisition. Once requisition accepted by sanctioning authority and Inventory admin Inventory admin will allocate the inventory.
- Employee have the provision to accept or reject Issued Inventory
- Without accepting issued Inventory employee cannot raise new Inventory requisition.
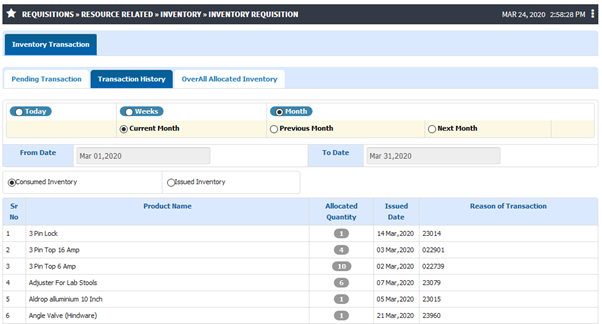
- Employee can able to view Inventory transaction history.
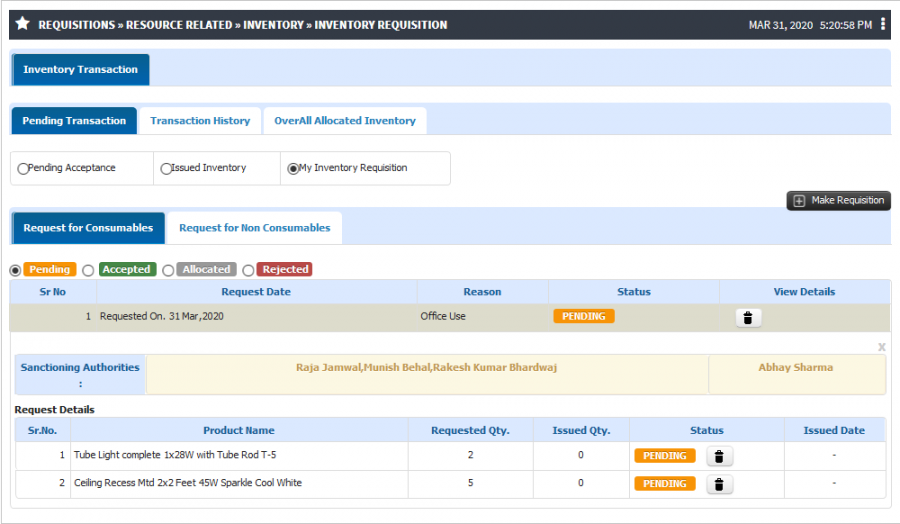
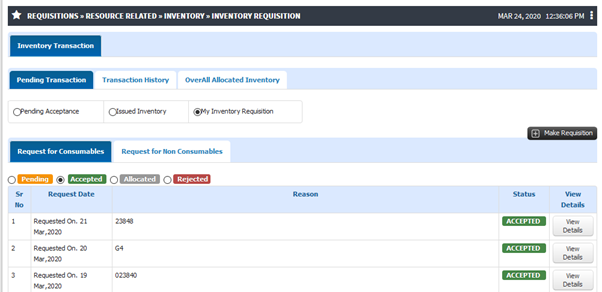
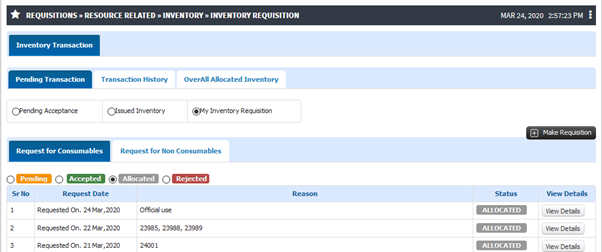
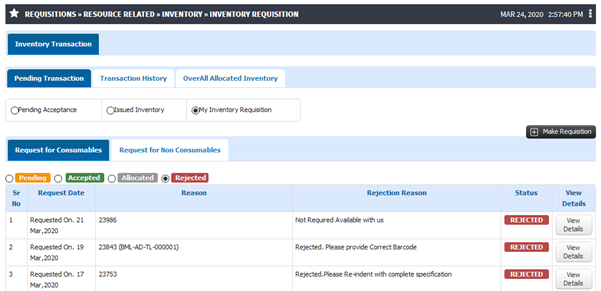
- Employee can monitor the requisition status. (Pending/ Accepted/ Allocated/ Rejected)
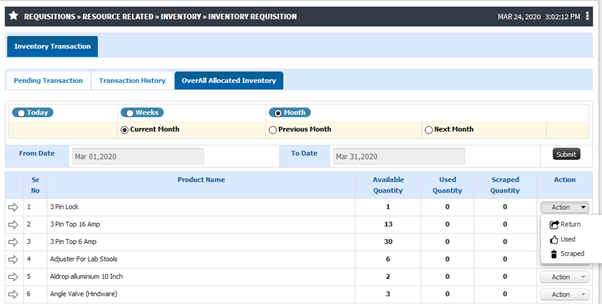
- Employee can see the Overall allocated Inventory item.
- Employee have the provision to raise requisition for the Item which are not available in system.
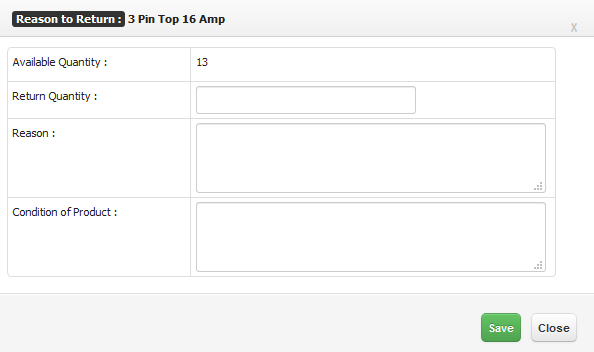
- Employee have the provision to return the Inventory to the Inventory admin.
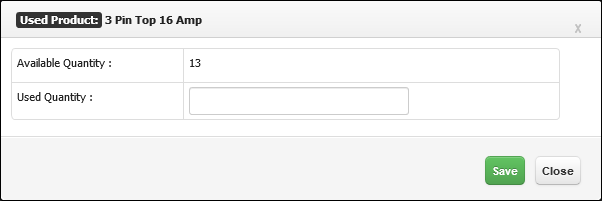
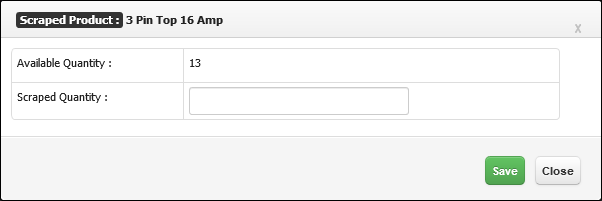
- Employee can show the consumption of the Inventory item.
Screen Shots / Steps
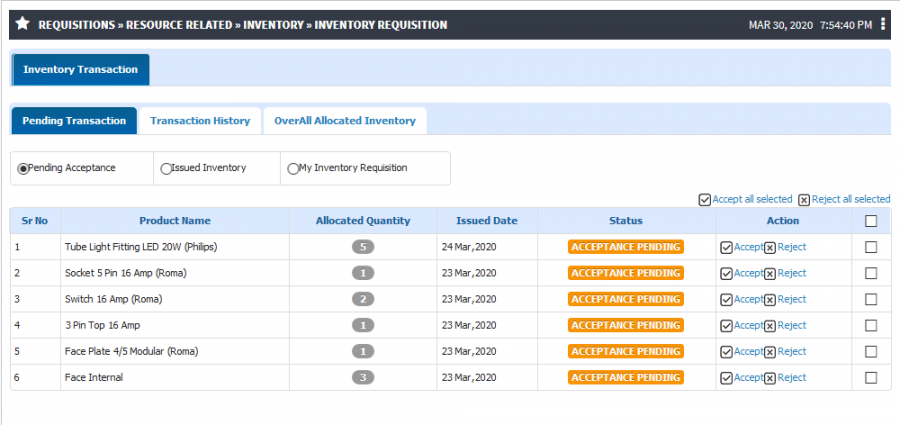
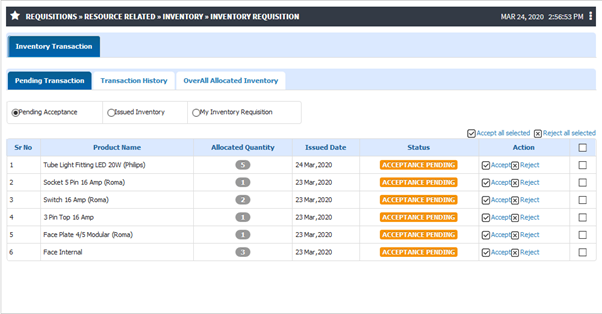
Pending Transaction - In pending transaction user can Accept or Reject allocated inventory.
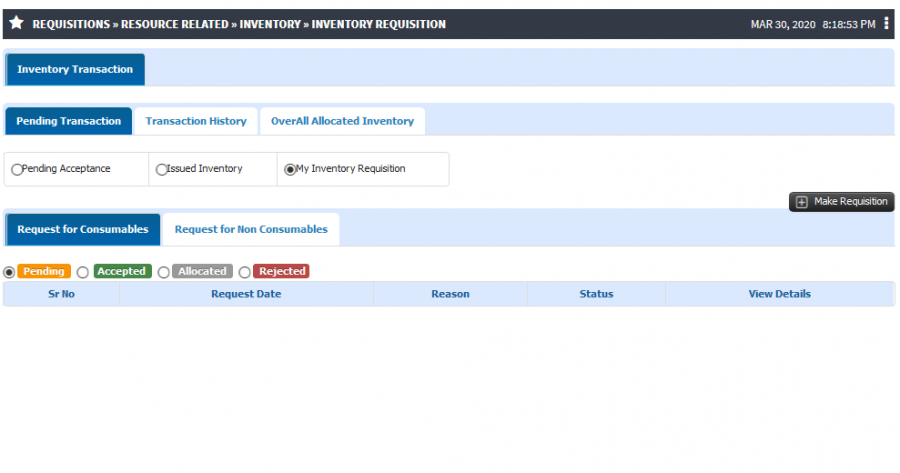
- To make new inventory requisition go to the My Inventory requisition section. - User can see the pending Accepted and Allocated or rejected Requisition.
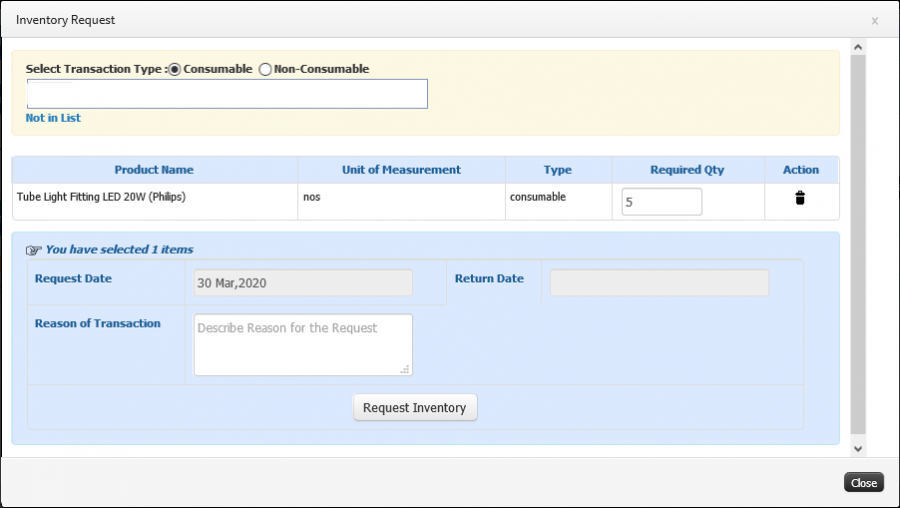
- Click on Make New Requisition button. - Select Transaction Type and search the product name in searchable textbox.
- Select the Product from the list and enter required Quantity, Reason of transaction and click on Request Inventory button.
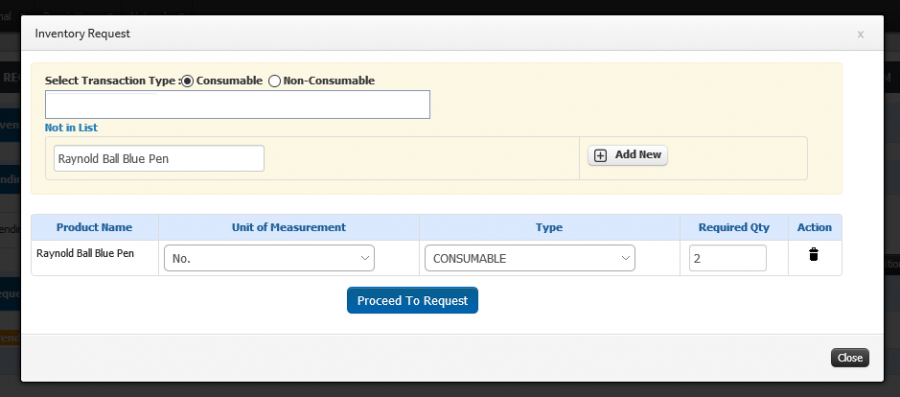
Not in List
- Not available Item can be added in Not in list
- To add product click on Not in List hyperlink.
- Textbox will be enable, Enter product name and click on Add new Button.
- Once product added select UOM, Product type ( Consumable/ Non-Consumable ) and Required Quantity.
- If any modification has to be done in the product name after adding click on delete button.
Accepted Requisition
Pending Inventory to Accept
Allocated Inventory
Rejected Inventory requisition
Transaction History
Overall Allocated Inventory
- Employee Can return the inventory. Once it is accepted by Inventory admin It will reduce the stock from the employee’s name.
- Employee Can show the consumption of the inventory product (Used / Scraped)
Return Inventory Item
Mark Inventory status as Used
Mark Inventory status as Scraped
